In the past i.e. in1990 and early 2000s websites were a very complex and required a lot of resources to design and develop. Some websites involved huge development teams and taking months or years to deploy. Nowadays, you can even develop and deploy your website on your own using CMS platforms such as WordPress infused with powerful page builders such as Elementor.
What is Elementor?
Elementor is a drag and drop page builder used for designing awesome and stunning WordPress websites. It is very simple to use that even a beginner can use it to design and deploy his/her website to the world.
It can be installed as a plug-in and customize the layout, stylings and advanced features of your website such as margin spaces, responsiveness and motion effects.
Why you should use Elementor
The popular website builder has over 5 million + installs on WordPress making it among one of the most used page builders in the market. It has been tested with different kind of websites such as E-Commerce, Agency websites, blog etc. Therefore, it is very stable for your website.
Elementor uses drag and drop features, enabling you to design faster, more efficiently and easier. It also has a variety of widgets to choose from to customize your website and give it more functionality such as headings, buttons etc.
It is add-on enabled. This means that you can add Elementor Add-ons to boost its capability and functionality. A good example is Ekit and Essential Add-ons.
What does Elementor do?
Elementor enables its users to customize WordPress web pages and blog posts to suit their niche and brand position. You can also use it as a theme customizer to edit your website’s look and feel(UI/UX).
Moreover, custom templates are also the powerful page-builder’s specialty. Elementor designs custom templates that you can use as a section or an entire page.
Is Elementor Free?
Yes there is a free version of Elementor in WordPress. However, there is a pro version of Elementor that comes with more premium features such as Woo Commerce widgets, more template layouts etc.
To get the free version:
- You can install it as a plug-in on your WordPress dashboard.
- Go to the Elementor website and download it.
How to install Elementor in WordPress
1.Installing WordPress via Elementor.com
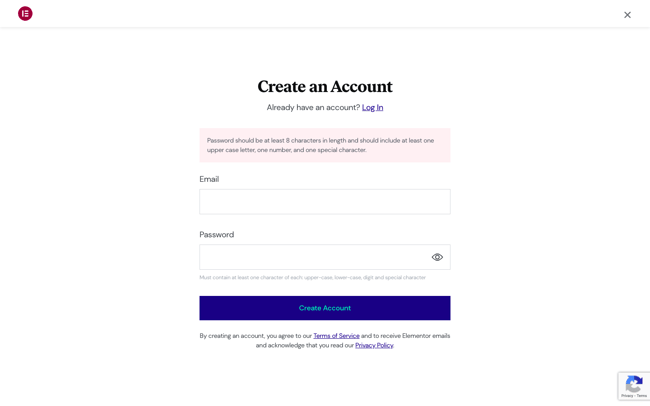
Step 1: Go to Elementor.com and click on Get Started.

Step 2: Log in or fill in your email address and password to create an account.
Step 3: Answer a few questions about who the website is for and how much experience you have building websites. This is to enable the platform best customize it for you.

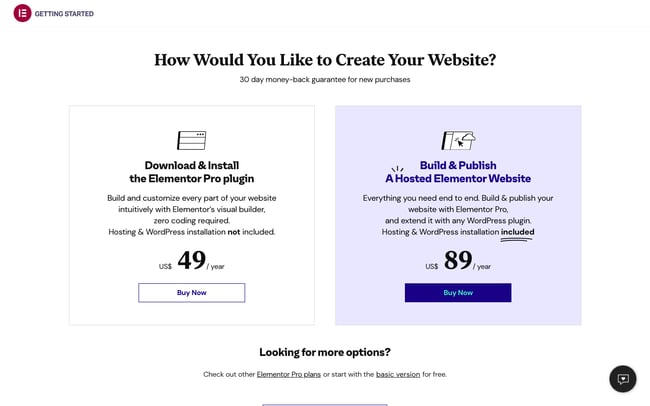
Step 4: Select how you would like to build your site. You can purchase the Elementor Pro plugin or a bundle that includes the plugin as well as a WordPress installation and hosting. You can also check out other pro plans or start with the basic free version. For this demo, we’ll pick and use the Free plan.
Step 5: Elementor requires you to have an active WordPress website, enter your website’s domain into their domain checker to make sure your site is on the WordPress CMS platform.

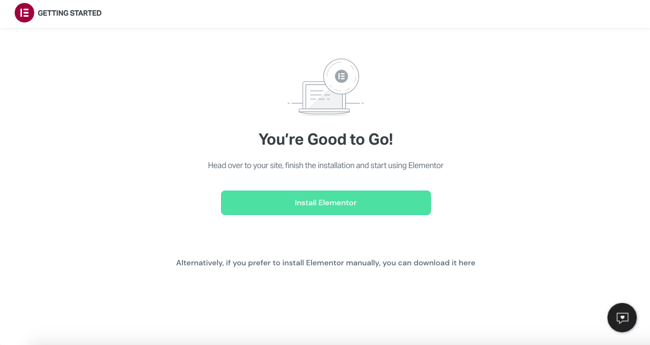
Step 6: After your site’s compatibility and availability is confirmed, click on Install Elementor.
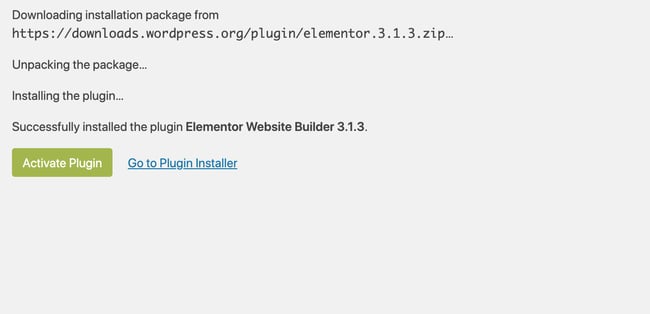
Step 7: If you’re directed to your WordPress admin login page, go ahead and log in. If you’re already logged in, you’ll be taken directly to the Elementor plugin page. Click Install Now in the bottom right-hand corner.
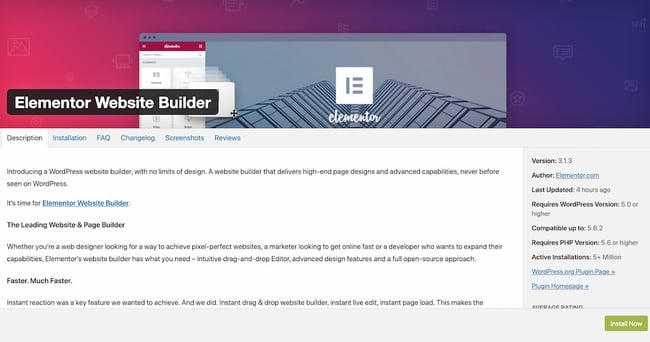
Step 8: After, you’ll arrive to a page with a confirmation message. Click Activate Plugin.
Finished! You’re all good to go and ready to start using the Elementor page editor.
2.Installing Elementor via WordPress Dashboard
Step 1: From your dashboard, click Plugins > Add New.
Step 2: In the search field, enter Elementor and locate Elementor Website Builder.
Step 3: Click Install Now. After installation, click Activate, in my case I have already activated and installed the plug-in.

The page builder will automatically be added to your sidebar. However, this sidebar menu item is only for accessing Elementor’s settings on the back end, not for editing your pages. If you would like to edit pages and post with Elementor just a little patience.

How to use Elementor in WordPress
Elementor offers an intuitive design for users. So, you can learn the basics of the editor in a couple of minutes.
Step 1: To get started, create a new page or post and click Edit with Elementor.

Step 2: You’ll enter the Elementor page editor. This is what your page will look like:

Step 3: On the left side, you’ll see the Elementor sidebar with all the drag-and-drop features you can use to build your web page.
Before you start dragging and dropping widgets, you first have to understand that the Elementor editor consists of three main building blocks: Sections, Columns, and Widgets. Sections are the largest building blocks. Within Sections, you can add groups of Columns, and Widgets are housed within Columns.
The editor will tell you where you can drag a widget by highlighting Sections and Columns in a blue box. Note that you can’t drag a widget into the navigation bar or the heading.
You control the Sections, Columns, and Widgets using the blue handle. Just right click the handle to edit the blocks.

Step 4: When you’re ready, simply click, hold, and drag a widget to the place where you’d like to add the new module. For example, when you scroll to the bottom of the page, you’ll have the option to drag a widget into a new, empty area.

Step 5: You can search for specific widgets to customize your pages. Choose from basic elements, like a heading or image gallery, or explore more advanced elements, like animated headlines and testimonial carousels.

Step 6: Click the hamburger button in the left corner, then Site Settings. In this menu, you can set the default colors and fonts for your pages. You can also configure global settings for your entire website on Elementor.

Step 7: Finally, you can click on the History icon at the bottom of the panel to access Elementor’s built-in Revision History section. Under the Actions tab, you can trace your changes, moving back and forth between each action. Under the Revisions tab, you can switch between your revisions and revert back to any previous version.

How to Build Your First Page in Elementor
Elementor stands out from its competitors because of its ease of use. Try it for yourself by building your first page in the platform — no coding skills required.
Step 1: Go to your WordPress dashboard.
Step 2: Click Pages, then Add New.
Step 3: Click Edit with Elementor to enter the page builder.
Step 4: Elementor will load to look like this:
Step 5: Next, add a Heading, Text Editor, and Image widget.
Step 6: Once you drag it in place, you’ll be able to edit each widget to your heart’s content. Click the green Publish button, and done! You’ve built your first page in Elementor.
Step 7: When you’re finished designing your page, you can preview and then publish it. To start, go to the panel on the left side of the Elementor editor.
Step 8: To preview your page, click the eye icon.
Step 9: To publish, click the green Publish button.
Elementor Free vs Elementor Pro
Elementor pro is quite a beast when it comes to capabilities and functionalities. However, you can build a beautiful and dynamic website with the free version of Elementor.
If you are starting out as a beginner web developer and you are on a budget, Elementor can help make your dream a reality by development of a multi-functional website.
Differences between Elementor Free and Elementor Pro
| Elementor Free | Elementor Pro | |
| Price | Free | Starts at $49 per year per site |
| Number of widgets | 25+ | 50+ |
| Page builder | ✓ | ✓ |
| Theme builder | X | ✓ |
| Included 24/7 support | X | ✓ |
| Dynamic content | X | ✓ |
| Pro templates and blocks | X | ✓ |
| Integrations | X | ✓ |
Elementor Pro Pricing
If you’re thinking about picking up one of the paid versions of Elementor Pro, you should note that all three plans offer the exact same features!
The only difference between Pro plans is how many licenses you’re purchasing at once.

- With Essential plan, you get Elementor Pro for one website for $49 per year.
- With Advanced plan, you get Elementor Pro on 3 websites for $99 per year.
- With Expert plan, you get Elementor Pro on 25 websites for $199 per year.
- With Studio plan, you get Elementor Pro on 100 websites for $499 per year.
- With Agency plan, you get Elementor Pro on a massive 1,000 sites for $999 per year.
Which one is right for you? For individuals or small teams, Expert plan is definitely the best value, if you are a creating websites for clients it is the most suitable as it is versatile and can handle a number of websites. However, if you are using Elementor Pro for your own single Website/blog I recommend using the essential plan.
Elementor Settings
Elementor has various settings that will enable you to customize the page builder to your liking and preference. This settings aid the elementor uses adjust responsiveness, add integrations, run experiments and so much more exciting features.
Elementor also offers managers the option to assign roles for your team to collaborate on projects and monitor their productivity. However, this is only availabe for Elementor Pro users.
Merits and Demerits of Using Elementor Page Builder
Just like everything else, Elementor has its pros and cons. While the merits outweigh the demerits , we’ve listed them both here for you.
| Merits of Elementor Page Builder | Demerits of Elementor Page Builder |
| Simple and intuitive interface | You need to upgrade to the Pro version for support |
| Drag and drop page builder | No lifetime pricing option |
| Easily customize pages for various devices (desktop, mobile, tablets) | Cases of slow page loads |
| Live, real-time previews while editing | |
| 90+ widgets, more than 300+ templates, and several blocks to choose from | |
| Seamless integration with third-party tools | |
| Secure with regularly updates | |
| Create custom themes, attractive pop-ups, and animations | |
| Compatible with all themes | |
| Integrates perfectly well with WooCommerce | |
| The free version works great |
Conclusion
To summarize it all, Elementor is an awesome page-builder that can do wonders if its capability is fully unleashed. Elementor pro comes with even more premium features for scaling up your business.
One thing you can be sure about is that this is a great page builder that eliminates website design challenges to benefit its users and ensure they are confident with their websites.
Thanks for taking time to read this article and hopefully it will help you when using Elementor to create your website. If you have any questions or remarks you can share them on the comment section.
Hello,
You can only achieve financial freedom when you create multiple streams of income.
I have an investment portfolio that will benefit both your company and ours. I hope it will be appealing to you. We provide funding through our venture capital company to both start-up and existing businesses looking for funding for expansion or to accelerate growth in their company.
If you would like to discuss extensively, kindly email back for further discussion.
I look forward to your quick reply.
Sincerely,
Tigran Ayrapetyan
Email: tigran.ayrapetyan@devcorpinternationalec.com
Investment Director
Devcorp International E.C.
P.O Box 10236 Shop No. 305
Flr 3 Manama Centre, Bahrain